In this guide, you’ll learn how to configure chatbot flow triggers. #
With the help of a robust chatbot flow builder, Messenger Monk enables you to design automated conversation flows.
Our bots can respond to consumer enquiries under predefined scenarios by setting up flows with specific triggers and scenarios.
Actions taken by subscribers or keywords included in their messages serve as triggers.
These are the following triggers for Messenger Monk:
Get Started: Following a consumer subscribing to the Chatbot, such a trigger initiates a flow after a predetermined time.
Keywords: This trigger starts a flow when it receives a message from a subscriber that contains a particular keyword.
Get Started #
1. Select Bot Manager from the Navigation Panel
2. Click on Get Started Settings and Enable the Get Started Button Status
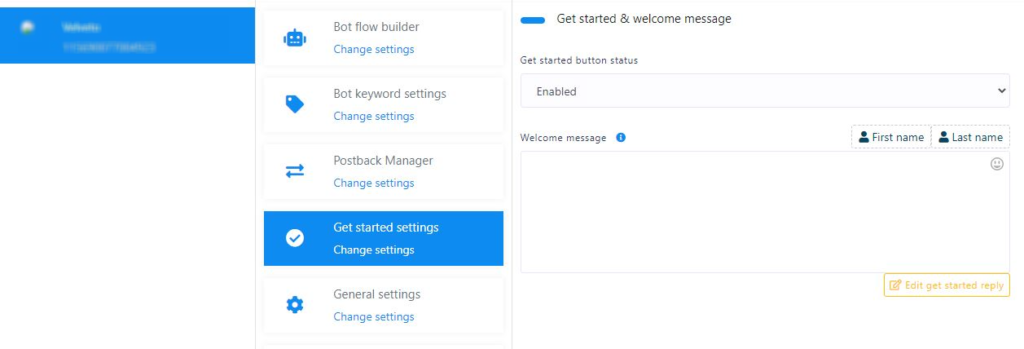
3. Type your welcome message in the next section.
4. Click on “first name” and “last name” in places where you want to greet the user with them.
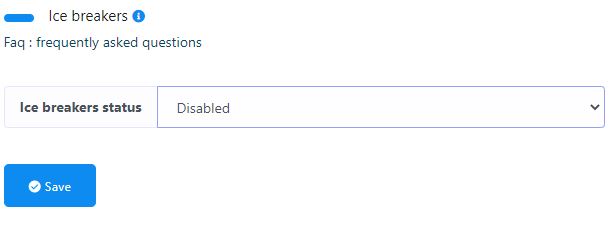
5. Keep the ice breaker status disabled if you don’t want to lead the user with any FAQs.
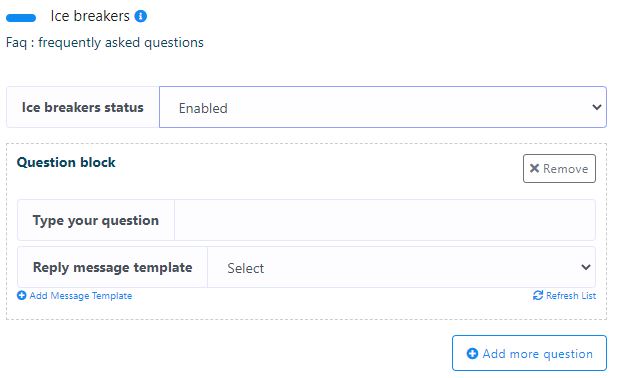
6. Enable them to show couple of FAQs in the chat box.
Keywords trigger in Chatbot Flow #
1.Click & drag Trigger Keywords From the Elements Section to the Main Interface.
2. Double-click on the Trigger Keyword menu.
3. Add the specific keywords for which you want the bot response should be triggered (Separate each word with a comma)
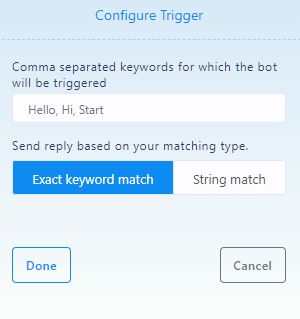
4. Select your preferred match type and save it.
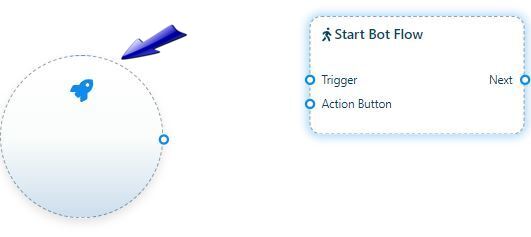
5. Connect your trigger with the Bot Flow.
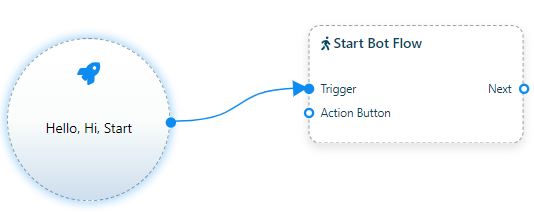
6. Give a title to the Bot Flow and choose a label (if necessary).
7. Select the “Next” Node Socket in the bot flow menu and connect with the relevant element.
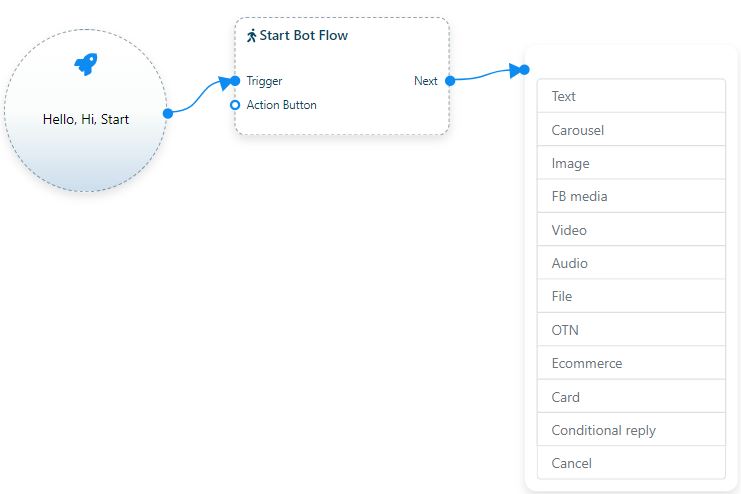
Hurray, You have successfully set up a trigger and generated a Chatbot flow.


